A solar system is a one-time investment which can reduce your electricity bills to almost zero.
However, there are several technicalities about solar panel installation that must be followed to get the best results. An incorrect installation can significantly reduce your power generation and thereby, your return on investment.
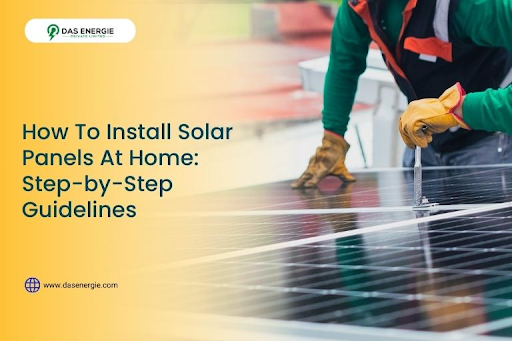
So, how to install solar panels at home? From selecting the best solar panels to properly installing the mounting structure, let us understand the right method to install a solar system at home.
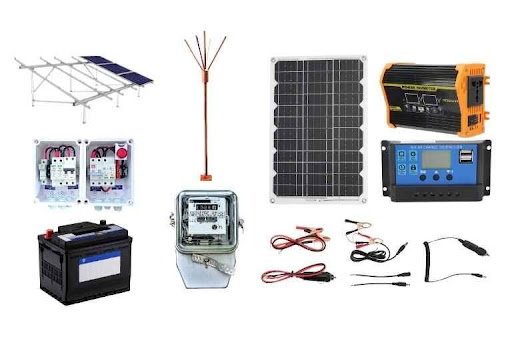
It is crucial to use the right equipment to install your solar system. Here are the key components you will require:
It is important to follow the correct procedure to install solar panels. Here are the steps for installing solar panels at home:
The mounting structure is the skeleton of your solar system. It must be galvanised so that it can resist corrosion. In our blog, we have covered everything about the different types of mounting structures.
Solar panels have mounting holes on the rear. These mounting holes must be aligned with the rails of the mounting structure. At least 4 mounting holes must be fastened to the mounting structure via nuts and bolts.
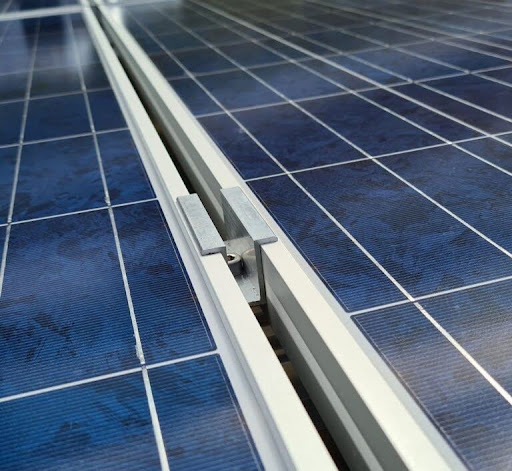
Since the panels can expand as they get hot, you need to keep a space of 8 mm to 10 mm between each solar module. You must place solar clamps between 2 consecutive solar panels.
Image showing how solar clamps are used
You need MC4 connectors and junction boxes to wire the solar panels. 2 types of connections are possible for installing solar energy at home: series and parallel.
Your vendor has to evaluate the specifications of your solar inverter and batteries (if any) to decide which type of connection is the best for your solar system.
It is important to ensure that the output voltage of the batteries does not exceed the input voltage of the inverter. The terminals of the solar panels must be connected in the right order, that is – positive with positive for parallel connection and positive with negative for series connection. Otherwise, the modules could be damaged.
An inverter converts the direct current (DC) generated by the solar system into alternating current (AC). AC is the form of electricity which powers household appliances.
The positive terminal of the solar panel has to be connected with the positive terminal of the inverter and the same pattern is followed for negative terminals. In case of an incorrect connection of positive/negative terminals, your inverter can be damaged.
To know about the best solar inverters in India, read our blog.
In an off-grid solar system, solar electricity is stored in a battery. In an on-grid solar system, solar electricity is stored in a utility’s grid. You can also opt for a hybrid combining both options.
Depending on your choice between off-grid, on-grid, and hybrid solar installation, you have to connect your solar system to a battery, your DISCOM’s grid, or both respectively. In the case of an on-grid solar system, you have to apply to your DISCOM to install a net meter. You need to intimate the authority DISCOM or local electricity supply company to get approval for net metering.
Read our blog to learn more about the difference between on-grid, off-grid, and hybrid solar systems.
You require an MPPT charge controller to store solar electricity in a battery. The input terminals of the charge controller have to be connected to the solar panels and the output terminals have to be connected to the battery. Our blog covers what is an MPPT in detail.
Lightning can irreparably damage your solar system. But earthing can protect it.
You need to install a lightning arrester at an appropriate height to protect the solar system. Earthing wires and copper plates buried beneath the ground will ensure that electricity does not enter the solar system’s circuit, but go into the earth instead.
Once the solar system design is finished, you can turn on the inverter. It will complete the circuit and the solar panels will generate electricity as sunlight falls on them.
Get a quote from a DISCOM-empanelled vendor to install your solar system
The angle at which sunlight falls on the solar modules decides their productivity. The latitude and longitude of your home will decide the correct solar panel orientation.
Solar panels have the maximum output when sunlight falls perpendicularly on them. Large solar parks even install solar tracking systems to track the sun’s movement to maximise power output. A solar installer has to check your roof and the angle at which the sunlight falls on it to decide the right orientation.
To know more about the best solar panel direction and angle, read our blog.
Here are some important safety tips for installing a solar system at home:
Wear Protective Gear
Important safety gear includes helmets, gloves, and glasses. Wearing protective gear is critical for the safety of the solar installer.
Use Right Equipment
Several tools such as ladders, harnesses, screwdrivers, electrical testers, hammers etc. are required during the solar system installation. Ensure you have all the necessary equipment to install the solar system.
Don’t Connect to Grid During Installation
Your solar system must not be turned on during the solar system installation. It can lead to a flow of electricity from the DISCOM’s grid to the solar system which can prove fatal for the solar installer.
Secure Panels and Mounts
The solar panels and the mounts must be strongly fastened to the mounting structure. Their strength will ensure that the solar system can endure harsh weather and strong winds, thus guaranteeing the safety of the solar panels.
Here are some of the important factors to consider while installing solar panels at home:
Your Electricity Bill
The primary purpose of installing a solar system in your home is to reduce your electricity bill to near zero. Therefore, you have to check how much is your electricity bill. The bill will be more in the summer season than in winter. Do keep that in mind while calculating your financial savings and energy requirements.
Determine the Capacity of your Solar System
Your electricity bill mentions how much energy you consume monthly. The capacity of the solar system must be such that your entire monthly electricity requirements can be met from it.
Number of Solar Panels Required
Once you have estimated the required capacity of the solar system, you must calculate the number of solar panels required. Simply divide the capacity of the solar system by the capacity of each solar panel to find the answer.
Select the Area for Installing the Solar System
The solar vendor must install the solar system at a place which receives good amount of sunlight and where nothing obstructs the sunlight. Take special care to ensure that no shadow covers the solar panels. Here’s a table which gives a rough estimate of how much space solar systems of different systems occupy:
| Solar Power Capacity | Area (in sq. metres) | Area (in sq. ft) |
| 1 kW | 5 sq. metres | 55 sq ft |
| 2 kW | 10 sq. metres | 110 sq ft |
| 3 kW | 15 sq. metres | 165 sq ft |
| 5 kW | 25 sq. metres | 275 sq ft |
| 8 kW | 41 sq. metres | 440 sq ft |
| 10 kW | 51 sq. metres | 550 sq ft |
Arrange Necessary Equipment
From safety gear such as helmets to components such as the solar panels and the mounting structure, you must arrange all the necessary equipment for installing the solar system.
Select Solar Panel
You must compare the specifications of solar panels in the market to decide which solar panel is the best. Read our blogs to learn about the top solar companies in India and the best solar panels in India.
Conduct Technical and Feasibility Study
Your solar vendor must assess the condition of your roof, the angle at which sunlight will be incident on your solar system, the best way to install the mounting structure etc., to ensure a perfect home solar system installation.
Our solar experts can resolve all your queries
Prepare Your Budget
From the outset, you must be clear about how much you are willing to spend on installing the solar system. At the same time, you need to calculate the return on investment. By dividing the total cost of the solar system by your average monthly savings, you can calculate the duration in which you will recover your investment.
In case you install an on-grid solar system, you could also be eligible for the PM Surya Ghar subsidy. Here’s a table showing the price of different on-grid solar systems before and after subsidy:
| Rooftop Solar Capacity | Installation Cost | Subsidy | Cost After Subsidy |
| 2 kW | Rs.1,40,000 – Rs.1,80,000 | Rs.60,000 | Rs.80,000 – Rs.1,20,000 |
| 3 kW | Rs.1,90,000 – Rs.2,30,000 | Rs.78,000 | Rs.1,12,000 – Rs.1,52,000 |
| 5 kW | Rs.2,90,000 – Rs.3,30,000 | Rs.78,000 | Rs.2,12,000 – Rs.2,52,000 |
| 10 kW | Rs.5,40,000 – Rs.5,80,000 | Rs.78,000 | Rs.4,62,000 – Rs.5,02,000 |
Apply for Subsidy (Only Applicable for On-Grid System)
If you want to install an on-grid solar system with DCR-certified and ALMM-listed solar panels, you will be eligible for the PM Surya Ghar: Muft Bijli Yojana subsidy. You can go to the official website of the scheme to apply for the subsidy. Once the DISCOM grants approval for installing the solar system, you can apply for net metering and then receive the subsidy.
You may save some expenses by installing your solar system on your own. But if you want to power your entire home with a solar system, it is best to trust an experienced solar vendor to install your solar system. Here are some reasons why you must avoid a do-it-yourself (DIY) installation:
We recommend that you get in touch with a DISCOM-empanelled vendor for your solar system installation. They know how to install solar panels at home and will follow the relevant government guidelines for the best solar installation. For the maintenance and cleaning of your solar system, you can opt for a solar AMC.
To receive quotations from multiple solar vendors, you can use our solar quotation service. We have onboarded solar installation companies across India. We have thoroughly researched their credentials before onboarding them.
Get free quotations for solar system installation
You must ask a professional solar installer about the best way to install your solar system. The solar installer will inspect your roof to decide how to install the solar system. You will need a strong, corrosion-resistant mounting structure to install the solar system.
A solar system can be installed at your home within 5 to 8 hours. But getting necessary approvals such as a feasibility report, commissioning certificate etc. from the DISCOM can take a month or more. Moreover, you must wait until the DISCOM installs a net meter for your solar system.
It is best to call a professional solar installer to install your solar system. Installing the solar system yourself can lead to mistakes and you could even damage the solar system.
Solar panels can be installed in shade-free places such as your roof or on the ground. You need to ensure that you have sufficient space and enough sunlight falls at that place.
Using poor-quality mounting structures, not installing the solar panels at the correct angle, and allowing shadows to cover the solar panels are some of the common mistakes during solar panel installation.
You can buy solar panels from your local solar dealer, e-commerce websites, or the websites of solar panel manufacturing companies. You can also browse our website to find solar panels and related products.

Our installation partners will check your requirements and send you quotations within 48h hours.
Your site visit will be scheduled at the provided location. The team will connect for a better experience.